 |
 |
Stay updated!
Printing is a diverse and ever evolving industry. Stay ahead of the game by subscribing to our news.
Featured Videos
View the videos below to see our work in action.
Feel free to browse our Video Gallery
-
Gallery of Services

Feel free to browse our showcase galleries featuring some of the best exhibition displays, retail displays, point of sale and point of purchase displays as well as a host of vehicle branding solutions as well as outdoor media such as building wraps and large outdoor banners.
Read More ›
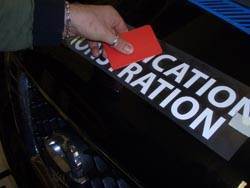
Fitting Instrucctions
This fitting instruction for vinyl decals / stickers are for guidance purpose only and is one of many methods of vinyl decal installation we feel is the safest way to apply without any professional experience. If you are unsure please do not hesitate to contact our installation team on 01932 33 88 99 ext 201
Tools Needed: a squeegee, scissors or scalpel blades, masking tape, Tape measuring, cleaning solutions (panel wipe, mentholated sprits, rubbing alcohol NOT white spirit), lint free cloth, and maybe a helper if you are inexperienced!
Surface Preparation: Surface must be cleaned thoroughly to remove any wax, dust, or other contaminants. Wash area with grease-cutting detergent and rinse. Then wipe down with cleaning solution and lint free cloth.
Environment : Temperature should be between 10 to 30 centigrade. If outdoors, wind should be calm. Decals should not be applied in dusty environments.
Disclaimer: The techniques described here are intended as an overview of the vinyl manufacturer's suggested installation and removal methods. Pyramid visuals accepts NO responsibility for property damage, injury, or any other liability resulting from the use of these methods, or the installation of our decals on motor vehicles.
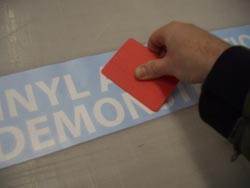
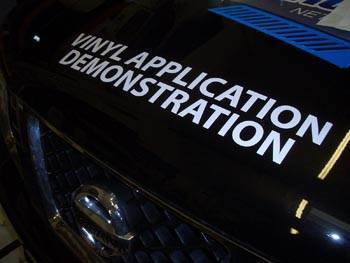
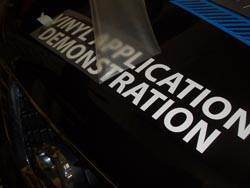
STEP ONE: Lay decal face up on a flat surface and firmly squeegee over the entire decal to ensure that the application tape is adhered to the graphics correctly.
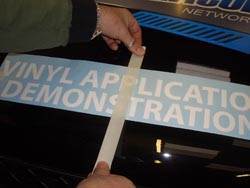
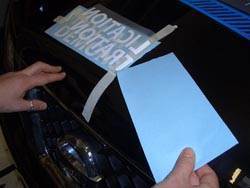
STEP TWO: Put a piece of masking tape on each end of your decal as shown and use a tape measure to position the graphic. Anchor each end to the application surface with the masking tape.

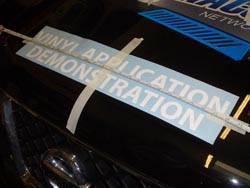
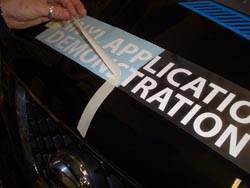
STEP THREE: Place a vertical length of masking tape across the centre of the decal to secure the vinyl transfer to the surface and create a centre hinge. This step allows you to apply half of the vinyl transfer at a time.
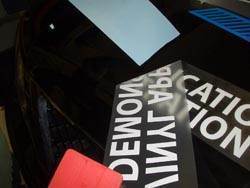
STEP FOUR : Carefully peel the application mask back to lift the decal away from the release liner. Sometimes the graphic does not want to lift away from the liner, and remains stuck to it. Watch carefully for this! If you see it happening, you must stop, back up, and press the application tape against the stubborn graphic piece with your finger.

STEP FIVE: Stop peeling the decal short of the hinge, and cut away the exposed half of the release liner with scissors or scaple. Do not tear it, as you want as clean a cut as possible. Discard the removed liner.
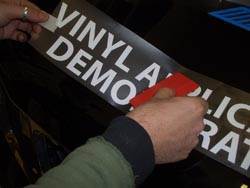
STEP SIX: Begin to squeegee the decal onto the application site, starting in the centre, working toward the free edge. Use short strokes, and keep enough tension on the mask to hold the rest of the decal away from the surface, and prevent air from being trapped beneath the decal. Work all the way to the free edge of the mask.

STEP SEVEN: Remove the vertical centre hinge masking tape, and repeat STEPS FOUR & SIX on the other half of the decal.
STEP EIGHT: Firmly squeegee the entire decal. Use overlapping strokes, vertically, horizontally and diagonally to thoroughly burnish the graphic into the application surface
STEP NINE: Carefully peel the application mask at a sharp angle as shown. Watch for graphic pieces that have not adhered to the application surface, and are lifting with the mask. If this happens, you must back up and re-squeegee that area, or firmly press the graphic onto the application surface through the mask. Remove the entire mask.
STEP TEN: Inspect the decal for edges that are not fully adhered and press them into place with your finger. Bubbles may be removed by piercing them with a fine needle and pressing out the air with your finger. Do not squeegee after removing the mask or scratching will result.
Click below to view the various services that we offer. View our Services