 |
 |
Stay updated!
Printing is a diverse and ever evolving industry. Stay ahead of the game by subscribing to our news.
Featured Videos
View the videos below to see our work in action.
Feel free to browse our Video Gallery
-
Gallery of Services
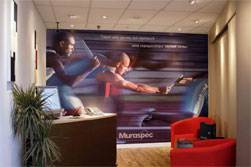

Feel free to browse our showcase galleries featuring some of the best exhibition displays, retail displays, point of sale and point of purchase displays as well as a host of vehicle branding solutions as well as outdoor media such as building wraps and large outdoor banners.
Read More ›
Viewing Distance
Viewing Distance: the Misunderstood Concept. Understanding viewing distance is a concept that has to be taught and examples are about the best way to do so.
Viewing distance is by far the most misunderstood concept involved in the printing and sign industries. What most people do not realise is that viewing distance goes hand in hand with the resolution and size of an image (end product). To attempt to put this concept into perspective here are a few things to think about.
While walking through an art museum you notice all of the wonderful paintings hanging on the wall. Chances are that the images are some form of reproduction of the original. Now, you think about the distance from which you are viewing the images, 5 feet? 10 feet? 15 feet? Can you tell the resolution of the image from where you are standing? A good bet is that what you are looking at is a lithographic reproduction of the artwork.
While driving down the road a billboard with a picture of Michael Jordan catches your eye. It looks life-like right? Now make an educated guess at the distance from which you are viewing the billboard. The distance will probably range between 500 to 2500 feet. Did you know that the average size of a billboard is 14 feet in height by 48 feet in length and that the resolutions of a billboard print range between 2 to 20 dots per inch (dpi)? Consider drawing a one-inch by one inch square on a piece of paper. Now draw two circles side by side in that one-inch square and fill them in so that they are solid black. What you are looking at is a resolution of 2 dots per inch. If you were to fill a piece of paper with as many one inch squares (including the filled circles) that will fit, place it on a wall and then stand back 20 feet suddenly, the paper starts to turn darker and the further you move back the darker the paper becomes until it appears solid black. This is the same effect that you see on a billboard.
If you were to view two identical prints that consisted of text and vector art, one printed at 300 dpi and the other printed at 600 dpi, from a distance of 10 feet away you would not be able to see any differences in the two prints. However, when viewing the same two prints between three to five feet a person might be able to distinguish a slight difference due to the dot pattern. The 600 dpi print will have smoother transitions in the filled areas. This would be most noticeable in the area that has a gradient fill from one colour to another. The only way to see a difference in the text is by using a magnifying glass. It is actually easier to see the differences, up close, on a photographic image but at a distance there is virtually no difference.
What all of this boils down to is that the closer the viewing distance the higher the resolution needs to be. The perception of the human eye varies from person to person and the only comparison that most people have is photographs.
The experiment
300 dpi – Step 1:
Scan a photograph at 300 to 600 dpi. Using a photo editing software program, re-size the image (an 8” x 10” will do) to fit on an 8.5” x 11” sheet of paper, but make sure that, at that size, the resolution is set to 300 dpi/ppi (pixels per inch). Most of you will probably have a fairly good desktop inkjet printer that has the capability to print anywhere from 600 to 1440 dpi so, from the photo editing software, you need to print your scanned image. Before you print it, check to make sure that the settings on the printer are set to print in high quality mode.
150 dpi – Step 2:
Now, leaving the image size the same, re-sample or change the resolution of the image (do not re-scan the photo) to 150 dpi. Then, set the printer settings to a normal mode and print the image again. On the computer screen you may not see any apparent change unless you zoom in. The print may, or may not, look much different than in step one, which depends mainly upon your printer. You may, however, start to notice a few black dots in the print.
35 dpi – Step 3:
As in step two, re-sample or change the resolution of the image (do not re-scan the photo) to 35 dpi. Then, using the same printer settings as in step two, print the image again. On the computer screen you should now see an apparent change in image quality. The print will look much different than in step one and two. What you should now be able to see is the “jaggies” or a stair-step effect.
View each print image up close; about 12” from your eyes. Now view each of these at arms length. At that distance step one and two probably look very similar but step three still looks fuzzy. Then place all three prints side by side and step back five feet. Does the step three image look better? Step back ten feet. Can you see the difference in the images at all?
In digital printing the goal, of course, is to provide the client with the best possible product but you must also consider the product's use and the distance at which the public is viewing the product. What this little experiment should teach you is that:
1. The closer you view a printed object the higher the printing (and scanning) resolution needs to be. In most cases where the viewing distance is 1 to 10 feet a printing resolution of 600 dpi or more is needed. When your viewing distance ranges from 10 to 15 feet, a 300 dpi print works fine. Then when the viewing distance is 20 feet or greater, a 150 dpi print might be satisfactory.
2. The older 300 dpi large format printers still have a place in this market. Though they may not operate as fast as the newer models, they still get the job done and save a few bucks in your equipment purchase. A 300 dpi unit may not suit your needs though and a higher resolution unit may be the solution.
Print size, print resolution, scanning resolution and viewing distance all play their roles when it comes to digital printing. They work hand in hand and one affects the other. You have to analyse where and how the print is going to be used before it is printed. Keep in mind that it will take less time to process a 300 dpi image than a 1440 dpi image. There are times when high printing resolution is needed and that’s a judgement call between you and your client.
So the next time a client starts inspecting the prints with a magnifying glass and says “I see dots”, while your thinking to yourself “I see dead people…” just pick up the print and take a few steps backwards. Then ask, “how do the dots look now?
Click below to view the various services that we offer. View our Services